WooCommerce Shipping Zones have been introduced in WooCommerce 2.6. This is a new feature and it enables you to change how much will you charge for certain shipping zones. In this tutorial we will learn how to configure them and use them in our code.
This will be a large tutorial so be prepared to learn a lot! Also, as I like to do when doing something new, grab a cup of coffee, tea or any of your favourite development drink and let’s start:)
Don’t need a guide on using them? Jump straight to the code examples.
WooCommerce 3.0 has updated its code for Shipping Zones. Creating a Shipping Zone is done a bit differently than before. Check the refactored code.
What are WooCommerce Shipping Zones?
This is a feature that has changed the Shipping screen and also how Shipping Methods function. Since the WooCommerce and the Automattic team care about their users, they have coded them to be backward compatible.
That means that if you are using any custom shipping method coded with the shipping method API, it should work without any errors. That is the good side. The bad side is a minor one, but it still is: you can’t use shipping zones with your custom shipping method.
Unless, the developer who made it, updates it with the new shipping method API.
How to use the Shipping Zones?
This is fairly easy. Open the Shipping settings under WooCommerce > Settings > Shipping.
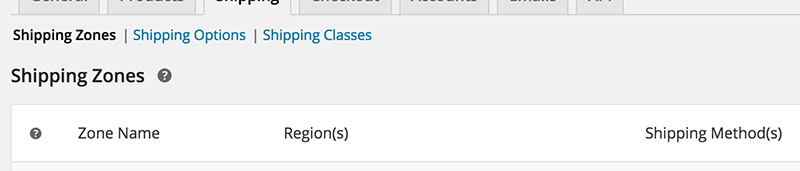
On that screen, there are three navigation options: Shipping Zones, Shipping Options and Shipping Classes. We will focus in this tutorial on the first navigation option Shipping Zones. The summary of the other two:
- Shipping Options – general shipping options such as showing the calculator on the cart page
- Shipping Classes – similar to categories, they can be added to products and the shipping rates can use them to calculate the shipping cost
On the initial screen which is the Shipping Zones screen, you can edit or remove the available zones and also define new zones. If there are no zones defined, WooCommerce will use the the default Rest of the World which is used for locations which are not included in any of other zones.
Adding new Shipping Zone
The best way to learn what we can do with the zones, is to create one. We will first create our zone and then we will also edit it. Click on the Add Shipping Zone button and you will get a new row with empty fields.
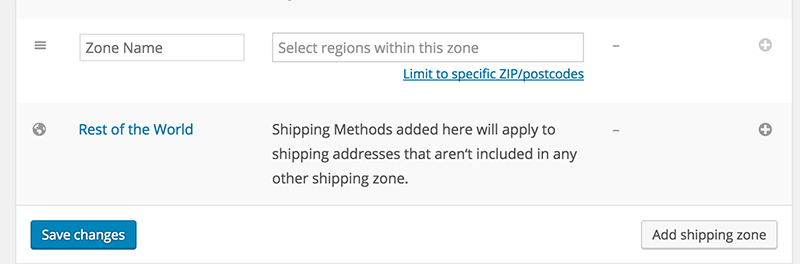
You can limit your shipping zone to specific Postal Codes but for this example I will use only several countries. My data will be:
- Zone Name: IBenic
- Regions: Europe, United States
Once you enter your own data, save them by clicking on the button Save Changes. Now we can decide which shipping methods will be used for our zone.
Adding Shipping Methods to the Shipping Zone
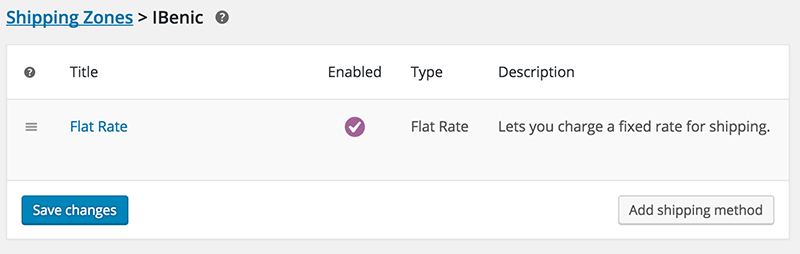
To add shipping methods, we can use the right “+” button or we can click on the View link when we hover over our shipping zone. This will get us to the screen of that shipping zone.
I will add only the Flat Rate shipping method. If we click on that method from the Shipping Zones screen, we will get to a new screen with the settings for that shipping method. If we click on that method from the screen of a Shipping Zone we will get a modal opened in the same window with the same settings.
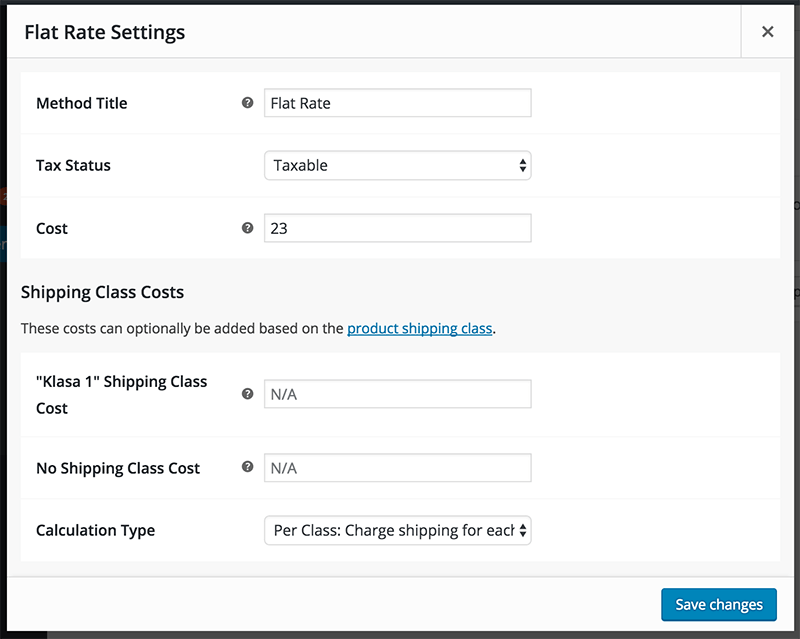
This shipping method is also developed with the Shipping Classes in mind. If you have added a shipping class, you will be able to define the cost for that shipping class under the Flat Rate.
Note that each setting is specifically defined for that Shipping Zone. It will not relate to other Shipping Zones with the same Shipping Method.
If you hover over this shipping method on the screen, you will get two options: Edit or Remove. Clicking on edit you can set the cost of this shipping rate and also cost of any shipping class if exists.
We now know everything about adding a new shipping zone and defining one.
Editing WooCommerce Shipping Zones
You can edit the shipping zone from the screen Shipping Zones. Once you click on the Edit link, you will see both fields editable as when you were adding a new shipping zone. Now easily rename your zone, edit or remove the locations.
How to Develop with WooCommerce Shipping Zones
When developing WooCommerce websites, you could have to develop your own shipping methods or automatically add shipping zones. You could even be asked from your client to add the shipping zones yourself, so creating them programmatically can be much easier. Let’s see how we can use WooCommerce Shipping Zones in the code.
This feature is consists of two parts: Shipping Zones and Shipping Zone. The first is used to handle all the zones together and the later is to handle one particular zone.
The Shipping Zones
All shipping zones can be handled by using one new class in WooCommerce: WC_Shipping_Zones. This class can be used to get a zone, delete a zone, get all zones, get shipping method and even get the appropriate zone by a package.
Getting all zones
All zones can be returned by this class using a simple method get_zones(). Since this is a static function we can call it like this:
The returned zones will be in an array of zones with the zone_id as their key. This is the structure you could get:
This is not a whole array, and the shipping methods can be really long with their definitions. But this was just an example so that you can have an understanding of how they are returned from the method get_zones().
Getting one single zone
If we know the ID of our zone then we can easily get a single zone definition. This is done by using the method get_zone(). Since this is also a static method, we can call it in the same way we did in the example above. We also need to pass the zone_id to that method:
This function will return an object of the Shipping Zone or false. From that, you can easily operate with that zone using that object. We will learn about it a little bit later in this tutorial.
Getting one single zone by parameter
This method of getting a single zone is almost similar. In fact, the previous method get_zone() is a wrapper method of this one. This method is get_zone_by() and the required parameters are $by (string) and $id (number).
The parameter $by can be:
- zone_id – gets the zone by the provided $id
- instance_id – gets the zone by querying the shipping method with the instance $id provided. Since instance ID’s are unique, the found shipping method by that $id will be unique to one shipping zone.
Here are two examples of using that method to get the same zone. The returned value will be an object of Shipping Zone or false.
Deleting a zone
WooCommerce Shipping Zones can be easily deleted by using the method delete_zone(). We only have to pass the zone ID in that method to delete that zone.
Get a zone by the package
The package is an object (array) that can be retrieved from the cart. The package object is also used for calculating shipping method’s costs. By passing a package to the method get_zone_matching_package(), a Shipping Zone object is returned.
Get a Shipping Method
The class WC_Shipping_Zones can also return a shipping method’s object. This is done by using the method get_shipping_method() by passing an instance ID.
We have now learned a lot about using WooCommerce Shipping Zones class. By using that class we can get a WC_Shipping_Zone object. Now it is time to learn what we can do with that object.
The Shipping Zone
The Shipping Zone object is an object instantiated from the class WC_Shipping_Zone. We can instantiate it by passing the $zone parameter. That parameter can be:
- numeric – ID of the zone,
- object – an object passed with zone_id
If the passed parameter is a 0 (zero) then the zone which is instantiated would be the default zone “Rest of the World”. If we don’t set a Zone name, the name will become Zone.
Once we get the object, we can do various things with it.
Creating/Saving the Shipping Zone
When we instantiate the object of a Shipping Zone, we can add or remove locations to it, rename it and similar. The important thing is also to save that changes. If the object is a new Shipping Zone with no ID, then we will also create it. The update and create methods are wrapped inside a single method save().
The object that we have passed in before did not have an ID. With the save() method, we have saved the new zone to the database. Now our zone object has also an ID.
Deleting the Shipping Zone
A Shipping Zone can only be deleted if there is an ID present in the object.
Getting Values
We can check upon the object’s ID by using the method get_id(). If the Shipping Zone was deleted, then the method would return 0. Besides the ID, we can also get the zone name, order, locations and shipping method using these methods:
- get_zone_name()
- get_zone_order()
- get_zone_locations()
- get_shipping_method( $enabled ) – the parameter $enabled is a boolean parameter that if true, the method will return only the attached shipping method that are currently enabled.
Setting Values
The class WC_Shipping_Zone allows us to set some values. This methods will set the new values while overriding the older ones:
- set_zone_id
- set_zone_name
- set_zone_order
- set_locations
The first three methods require a simple parameter such as a number for the id or order and a string for the name. The last one requires an array:
Adding Values
Besides settings values so that the previous ones are deleted, we can also add values. By adding values, the previous ones are still there and are not overwritten. We can add locations and shipping methods.
When adding a location, we must pass two parameters: code and type. Type can be:
- country
- state
- postcode
- continent
When adding a shipping method, we must pass one parameter: shipping method ID.
Clearing Locations
The object from class WC_Shipping_Zone allows us to clear locations. They can be cleared by the type. In that way, we can delete all locations or only locations from a specific type.
Example of adding WooCommerce Shipping Zones
Here is an example of using WooCommerce Shipping Zones from my eBook “WooCommerce for Developers“. In this example we will check if there is already a zone with the same name. If there is no zone with that name, we will create one and also add our shipping method to it.
In this example we are first getting all the zones and we are storing the names of those zones in an array. Then we check that array for our name. If that name does not exist there, we then create our new shipping zone.
Before we create the zone we also add our location (Croatia). After the zone has been saved in the database, we also add a shipping method. Both the WooCommerce Shipping Zones and the WooCommerce Shipping Method are described in great detail in my eBook “WooCommerce for Developers”.
Conclusion
Using this new feature is WooCommerce is of great help for many Shipping Methods. If the shipping method is developed with the WooCommerce Shipping Zones in mind, then even a regular user can easily change what they need when using the custom Shipping Methods.
What would also be nice:
What I would like to see is to have a way to block certain Shipping Zones from being edited or some part of them. This block could be used to stop users from editing locations for a certain shipping zone that is created by a shipping method.
If you have already worked with the WooCommerce Shipping Zones, share your experience with us in the comments below 🙂


Great article on the new shipping zones.
With the new AJAX calls, it would be useful to know how to work with sessions and the shipping zones.
I need to get the current shipping zone ID from the SESSION as the shopper changes shipping details at checkout (ie. as the AJAX calls are made)?
I need to unset PayPal for ID=0 (rest of the world) as shipping can’t be calculated for worldwide countries due to product weight. For ID=0 then resort to ’email order’ (Cash on Delivery) only and not PayPal as shipping not known.
However, this needs to be updated as the shopper changes shipping location.
Thanks.
Hi Jason, sorry for a late response. Have you figured it out yet? If you are looking to work with sessions and AJAX, I would suggest looking at their class includes/class-wc-ajax.php.
You can also hook your own functions on the WooCommerce when the checkout page is updated such as:
woocommerce_checkout_update_order_reviewIf you have to add different shipping APIs for zones, how would you go about this?
You can add them as many as you want from the admin area which is shown under “Adding Shipping Methods to the Shipping Zone”. If you are to add them programmatically, then you can do it by getting the zone object and use the method add_shipping_method. You can see that in the last code where we used: $new_zone_cro->add_shipping_method( ‘woodev_tisak_shipping’ ).
Great work, Igor!
The question is how to add instances of shipping methods – as we can add several instances of the same method to one zone. The problem is how to set instance’s oprions (name. cost).
The name and the cost can be done inside the Shipping Method. I would advise you to read the WooCommerce source code for the Flat Rate where they allow multiple flat rates per classes.
Here you can have more costs for a specific set of classes under which product’s reside. You can also do here what you need.
Here is the source code of that method: https://github.com/woothemes/woocommerce/blob/master/includes/shipping/flat-rate/class-wc-shipping-flat-rate.php
This is the whole folder and its contents used for that method: https://github.com/woothemes/woocommerce/tree/master/includes/shipping/flat-rate
The problem is to add method with the specific setting of instance.
This is really helpful. I’m trying to work out how to add a column for the chosen shipping method to my back-end orders page. I can add a column but I can’t work out what ‘label’ to use to call the correct data from the new shipping methods.
Any ideas?
Hi Hayley, sorry for a late response. If I have understood correctly you would like to show which shipping method is used for each order? I did not do that yet. I will have to look into it and maybe even write a tutorial once I do it.
I couldn’t refrain from commenting. Very well written!
Thank you Jimmy!
Thanks a lot for the documentation, this post saved me a lot of headaches. Google Merchant Center requires a shipping estimate for products, and being able to query the class_cost for a product pretty much solves that problem immediately with instance_settings[‘class_cost_*’]
I am glad I could help! 🙂
I wrote code to encourage customers to add more to their cart to avail of free shipping. The countries and cart total is hard coded which is obviously a maintenance issue: https://gist.github.com/damiencarbery/685de5bea3808939e97e9a803eccc934#file-rac-promote-free-shipping-php
Inspired by your examples I wrote code to determine the free shipping min amount for the current cart.
https://gist.github.com/damiencarbery/685de5bea3808939e97e9a803eccc934#file-rac-calc-free-shipping-min-amount-php
Unfortunately I do not know how to retrieve $package in the ‘woocommerce_review_order_after_shipping’ or ‘woocommerce_cart_totals_before_order_total’ actions. I’ve read through the class-wc-shipping*.php files a number of times but just cannot see code to get $package.
I could of course use set global variable in ‘woocommerce_load_shipping_methods’ and access it later but I’d love to do everything in one go.
Do you know how do achieve this?
Hi Damien,
you could maybe try the ‘woocommerce_cart_shipping_packages’ filter which is used in class-wc-cart.php where the
$packagesare sent. The package can then be used as$packages[0]. I have not tested it, but you can try and see.If not, use the action
woocommerce_load_shipping_methodsto set a variable. You could use the Singleton Pattern You can read more about that pattern here: https://carlalexander.ca/singletons-in-wordpress/ or https://code.tutsplus.com/articles/design-patterns-in-wordpress-the-singleton-pattern–wp-31621When having such class, you can use the action plugins_loaded to load the first instance of this plugin and then attach a method in the mentioned woocommerce hook. In that hook you could set a variable inside that class (known as attribute) to have the package info. Then you can also hook another method on other actions and use that variable inside it.
Great article, congrats! I’ve been trying to create a kind of zip code locator form so I could check against all the available shipping zones but I can’t find a way to loop through all the data to get only an array of all ‘code’ => ” of ‘type’ => ‘postcode’ for each shipping zone? It’d be great also if you could guide us with another article on how to get each shipping zone most reliable information such as the zone name, the country/state, the method title, the cost, as also all the zip codes for each shipping zone.
Hi Adriano, thank you for the idea. I will need to review it a little bit and see how to create an article around that problem/solution. After I am done with the current series I am writing, I’ll look into this one.
Hey Igor. Thanks for considering to write about it. I’ve postponed that idea for a long time, but now I’ve been thinking to reintroduce it on a new project giving the WC 3.X API enhnancements. I’m aware about a few plugins which enable such forms on single product pages or by using a shortcode.
Those plugin allow users to check for the zipcode delivery availability with along the cost and/or instructions. However, all those plugins I’ve came through require to add the zipcodes and any other data to their options manually.
Many WooCommerce powered websites might have a lot of data already set within the Shipping Zones settings. I mean, it seems to me an awful waste of time to use such plugins when you already all that data in place, but incredibly hard to be accessible.
Hi
I read your post, its a great tutorial to lean about woocommerce Shipping Zones, I am working with Shipping Zones for my client, so I am searching and found your good tutorial.
thanks once again
You’re welcome Faruk! 🙂 I am glad you liked this tutorial.
Good job man.
Is there any regular known way out to “block certain Shipping Zones from being edited or some part of them” now?
Hi Bijan, I am not aware of that possibility but knowing how WooCommerce really tries to be as extensible as possible, there might be a way of handling that. Try to check the source code of WooCommerce by first checking the editing screen for Shipping Zones and then go from there.
I am trying to add a filter by zone in the Order List. At the moment I managed to build the select field, but I don’t know how to add the “request” filter, how could it be?
add_action( ‘restrict_manage_posts’, ‘zod_order_filter_by_zone’ );
function zod_order_filter_by_zone(){
if (is_admin() && !empty($_GET[‘post_type’]) && $_GET[‘post_type’] == ‘shop_order’){
$exp_types = array();
$zones = WC_Shipping_Zones::get_zones();
foreach($zones as $z) {
$a = $z[‘id’];
$b = $z[‘zone_name’];
$exp_types[$a] = $b;
}
?>
$z) {
printf
(
‘%s’,
$k,
$k == $current_v? ‘ selected=”selected”‘:”,
$z
);
}
?>
<?php
}
}