Dynamic email templates are a very common thing and they are interesting to implement. In this tutorial we will create some email templates in our WordPress administration which will get populated by user data and sent to our email after a user registers.
We will create an OOP class that will simplify sending of our email templates.
The code in this tutorial can be used in any personal or commercial project. Be sure to understand the code before you use it in a project.
Creating Email Templates in WordPress
Email templates can be done in various way. They can be used as custom post types or they can be defined as settings. We will go with the second approach where we will make a new settings page with a single email template setting.
First, we are creating a new submenu under the menu Settings. In the callback function ibenic_email_template_submenu_cb we are creating the content of that page. Here we will have a form that will render all the sections and settings that are registered under our new submenu page with the slug email-templates.
Now we need to register settings:
In the first function we are registering our sections and settings. To learn more about the WordPress Settings API read on here. Section function does not display anything but you can add your own text to it. In the field function email_template_user_cb we are displaying the WordPress editor with the attribute id (and name) same as our setting field email_template_user. We are also getting the data from our setting and applying it to the WordPress editor so that it can be changed.
Add this content to WordPress editor and save it:
{{USERNAME}} has registered.
His/her email is {{USEREMAIL}}.
The content inside {{}} are placeholders that will be replaced with real data from our users. Now that our email template is ready, we need to create our class that will be used to handle emailing.
WordPress Email Class
This class will get the content of our template, replace all the placeholders with real data and then send to defined emails. Let’s get started with some simple attribute definitions.
Now that are attributes have been defined, we need to define our constructor method. The constructor method is the core of our class and it will be used to set everything and send the email.
First, we are assigning the emails to our attribute $emails and the subject of the email to the attribute $title. Also, our dynamic data is set to the attribute with the same name. This will be an associative array where the keys will represent the placeholders and the value will be the data that will replace them.
Before we prepare our template we will set it to our attribute $template. This will be the name of our template which is actually the settings field. After that, we are calling the method prepareTemplate. Once the template is prepared, our email is sent.
Let’s define methods that are missing:
The method prepareTemplate is calling our other method that will get our templates’ content. Once our templates’ content has been retrieved, we are replacing every placeholder with the real data.
In the method getTemplate we are returning the templates’ content. The final method send is calling the function wp_mail to send the email.
Sending the Email on User Registration
We will now hook a function to the action user_register so that we can send the email when a user registers. Since the email for registration will be sent originally by WordPress itself, I want to show you just an example on how to use this class and the email template. You could hook your functions to various actions and send specific emails.
In this hooked function we are getting the WP_User object so that we can access various data. After that, we are populating our dynamic data with placeholder and their value. If you notice it, we have written our placeholders in lowercase. That is not a problem since we have fixed that in our WordPressEmail class by transforming each given placeholder into uppercase values.
We are also getting the admin email. Here we could create an array of various emails if we want to send them to different people. Subject is also dynamically created with the users’ username. The last part is the name of our template and the instantiation of our WordPressEmail class.
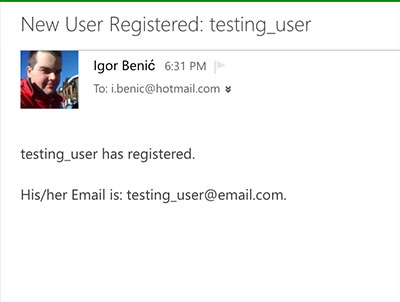
Here is an example of that email I have receieved:

As you can see on this image the username was testing_user and the email was testing_user@email.com.
Conclusion
Creating dynamic email templates can be fun. You can define which placeholders will be used in specific email templates and then by using a class similar to WordPressEmail class you can easily create a much better user experience since you can notify them on various particular actions.
I have created several dynamic email templates to send on a purchase, expiration of a service and several other things. You can even notify them if a wishlisted product was sold or a reservation for an appointment has been cancelled so they can sign up.
Have you ever had a need for a dynamic email template or templates? Have you created one and would love to share that? Please do in the comments below.
Become a Sponsor


Nice article.
Thank you Shafi:)
Very useful article.